Tampilkan postingan dengan label Emergency. Tampilkan semua postingan

Rabu, 08 Juli 2009

Why learn CPR?


It’s agreed that we cannot all be doctors or paramedics, and in an emergency situation we give preference to medical personnel who are trained and are equipped to handle such incidents. However, the very definition of an emergency implies an urgency in which time is of the highest priority, and every second without medical assistance is perilous to the patient. In these circumstances, it becomes imperative that all efforts be taken to save the persons life. The most valuable service that each of us as lay persons, as community members, and as responsible human beings can provide is the study and practice of CPR and Basic Life Support. CPR or Cardio-Pulmonary Resuscitation is the application of trained maneuvers designed specifically to aid the vital functions of our body. The basic forces that support life in each of us are the normal involuntary functioning of our heart and lungs. We aren't continually aware of them until it's apparent that there is a problem. When our ability to respire, or take in oxygen and expel carbon dioxide suffers, our body goes in to an alarm or shock stage. Our lungs may cease to inflate, our heart may stop its regular beating, and we come to be in a state known as distress. This distress occurs at three separate levels, namely Airway, Breathing, and Circulation, or the ABC's of Life Support. If the airway is obstructed, the lungs are without oxygen, and the heart starts to skip or stop its normal rhythmic beating. Uncorrected, death is imminent. Practice of CPR specifically targets these vital components and attempts to rejuvenate our lungs and heart from a distress state to a safe or non-distress condition, while we wait for emergency personnel to arrive at the scene. CPR and Basic Life Support is certainly not the highest level of care afforded to a person in physical distress. However, it is the support that we can afford to provide each other in the event of a life-threatening emergency. The knowledge that you or your neighbor or a room full of crowded strangers is trained in CPR and Basic Life Support serves as the trusted guardian that can mean the literal difference between life and death. As intelligent beings we embody the characteristics of self-awareness and self-preservation. The latter is our way of ensuring we stay alive. Intelligence must tell us then, that to be individually trained in CPR is to save a life, but to train as a community is to save our own.


»»  read more

Kamis, 11 Juni 2009

Earthquake Emergencies - 21 Tips To Keep In Mind


Earthquakes are one of the most devastating among all natural disasters. A rather disturbing yet unavoidable fact for the mankind is that none of the equipments, science or measurement scales is able to predict the precise way & time of the earthquake.
The only and hence the most effective means to minimize the severe effects of earthquakes amidst the human lives is making adequate preparations for the earthquake emergencies.
In the situation of an earthquake, one feels that the ground is shaking or rolling. In case the earthquake is a very sever one, that is the movements of earth's crust are really violent, one might also hear the ground roaring or rumbling.
These characteristics of an earthquake cause sheer panic among the people. Eventually this jeopardizes one's chance of the survival. Luckily strong & devastating earthquakes do not happen that usually. Even in the locations where there is a minimal chance of earthquakes that is the places & nations that are located near the ring of fire of the earth, it is imperative to have some emergency plans to keep yourself and your family safe.
Here are some tips that might help you getting prepared for the emergencies:
1. Prepare the emergency kits
a. It is very hard to know as to what remains after the earthquakes, so in case you live in an area really prone to the earthquakes, you must keep the emergency kits ready.
b. There must be one kit for everyone in the house.
c. Each emergency kit is your lifeline ensuring your survival after the earthquake.
d. It should contain: i. One gallon water ii. Food supply for at least 3 days iii. Select only non-perishable food iv. The first aid kit
e. Make sure that you regularly change the contents of the kit like food & water. f. Make sure that the food & water in the kit are of good edible quality else they would be of little use only.
2. Know All the Mains of All Your Utilities
a. Earthquakes often lead to fire due to gas leaks & electricity. b. You must know the main switches of all your utilities, so that you may turn them off as & when needed.
3. Inspect the House for Cracks & Fissures
a. Make sure to check your house's condition regularly in order to ensure that it can withstand even all the strong earthquakes. b. Make sure that there are no cracks on the walls & chimney. c. The door frames must be fixed. d. In case you live in some apartment, instantly report the cracks & fissures to the landlord.
4. Have the Evacuation Plan
a. Make sure that you & your family or the office mates have an emergency plan to face the disasters, like fire, earthquakes & floods. b. Every member must be aware of their duties and safety measures in such situations. c. Early preparation would ensure rather more safety of the family. d. Panic & confusion often lead to accidents & injuries.
Tips to face the Earthquake Emergency while it is Overhead
1. Make sure to stay away from the objects that may fall off.
2. Make sure to stay away from the book cases, hanging objects, cabinets, like chandeliers, ceiling fans, etc.
3. It is always advisable to stay laying down under some sturdy tables and / or door frames.
4. Just don't run around.
5. Do not make an attempt to leave the house.
6. Outside the house there are rather dangerous things waiting to injure you, like lamp posts and cars.
7. The emergency kit must be very accessible and ready all the time.
8. If possible, place the emergency kit in some place where everyone in the house or the office would run in to during a quake.
9. Make sure to stay away from your kitchen. This can be the most dangerous spot of the house in case of earthquakes, with the various pots & pans hanging around & drawers full of cutlery & knives.
10. Furthermore, gas leakage in the kitchen can be quite dangerous owing to the fire involved.
After the earthquake
1. Make sure not to light a match and / or the candle immediately after the earth quake. In case the gas there is leaking, it might catch the flame.
2. Switch off the main gas valve before lighting the match or candle.
3. In case you are suspecting gas leakage, open all the windows & evacuate the house immediately.
4. Now, call your gas company, after you have moved away from the spot of gas leakage.
5. Make the call, only when you are out of that spot as the mobile phone usage in the gas can also lead to a flame.
6. Often earthquakes are followed by some aftershocks. Do not put your guards down even though you, your house and the family are all safe.
7. Check the news to get information on the earthquake & other important updates.


»»  read more

First Aid Is Important For The Workplace


There are four major components of workplace first-aid, namely; first-aider, first-aid, box, first-aid room, and first-aid equipment. When deciding on the number of first-aiders, first-aid box, first-aid room and first-aid equipment for the workplace, the following factors should be considered: type of industry, number of workers, number of work shifts, and location of workplace in relation to the nearest hospital or aid station.
If there is a shift work schedule, there should be a sufficient number of first-aiders for each shift based. In a work-site where employees of different employers, such as in construction, are working together. The principal employer should provide and maintain safe systems of work which include provisions for adequate and appropriate first-aider, first-aid box, first-aid room (if needed) and first-aid equipment.
However, the relevant employers may make arrangement where one of them agrees to provide adequate and appropriate first-aider, first-aid box, first-aid room (if needed) and first-aid equipment. The agreement should be recorded in writing and a copy of the agreement should be kept by each employer concerned.
An employer should display a notice, in a prominent place in the work-site, of the names and locations of first-aiders. First-aiders should also be provided with a form of identification for easy recognition. An employer shall, from time to time, recruit or select suitable persons to go for first-aid training. The employer should consider persons with the following qualities to be trained in first-aid: physically fit, free from blood borne infectious diseases, and free to leave their work immediately to respond to an emergency
The training will be a course on first-aid conducted by institutions recognized by a governing body. The local telephone book will have many listings on companies given courses. Depending on the number of trainees, they will come to your workplace. Once trained, first-aiders will need to undergo recertification. Check with the course giver on years of validation. Employers should keep a record of the dates on which first-aiders obtained their training and the dates on which they received refresher training.
In the management of an injured worker or ill worker, first-aiders should:
> Give immediate first-aid treatment, keeping in mind that a casualty may have more serious injuries and illness.
> Arrange without delay for the injured worker(s) to be sent to a doctor, hospital or home, according to the seriousness of this condition.
> This first-aider's responsibility ends when the injuried are handed over to the care of health care personnel.
> A record of the injury and treatment given by the first-aider should be made.
> This record shall be kept by the employer for a period of five years.
> The record should include information on:
> The immediate treatment
> Details about the incident/accident including information about the work process involved
> Details about injury or work-related illness
> Any referral arrangements made such as the usage of local ambulance service, referral to local hospital
> Subsequent injury management.
First-aid boxes should be made of sturdy material and be portable so that it can be taken to the site of an incident. The boxes should also be clearly marked and kept current with a written record of contents. Each first-aid box should be placed in a clearly marked area. Where a workplace covers a large area, an adequate number of first-aid boxes should be provided. Employees should be informed of the location of all first aid boxes.
First-aid boxes should contain a sufficient quantity of suitable first-aid materials. They should not contain oral medication of any kind other than those required for first-aid treatment. It is essential that first-aid boxes be checked frequently so as to make sure they are fully equipped and all items are usable. Materials used should be replaced as soon as possible. The size and contents will be determined by the number of employees and type of industry. In the first-aid box, it is a good idea to have a quick reference sheet in first-aid and booklet. A quick reference sheet is handy for quick analysis of an injury.


»»  read more

Minggu, 24 Mei 2009

Life Saving Facts About Emergency Exit Routes For Your Office


What is an exit route? An exit route is a continuous and unobstructed parth of exit travel from any point within a workplace to a place of safety. An exit route consists of three parts: Exit Access - portion of a route that leads to an exit. Exit - portion of a route that is generally separated from other areas to provide a protected way of travel to the exit discharge.
Exit discharge - part of the route that leads directly outside or to a street, walkway, refuge area, public way, or open space with access to the outside. How many routes must a workplace have? Normally, a workplace must have at least two exit routes to permit prompt evacuation of employees and other building occupants during an emergency. More than two exits are required, however, if the number of employees, size of the building, or arrangement of the workplace will not allow employees to evacuate safely. Exit routes must be located as far away as practical from each other case one is blocked by fire or smoke.
Exception: If the number of employees, the size of the building, its occupancy, or the arrangements of the workplace allows all employees to evacuate safely during an emergency, one exit route is permitted. What are some other design and construction requirements for these routes? Exit routes must be permanent parts of the workplace. They must lead directly outside or to a street, walkway, refuge area, public way, or open space with access to the outside. Areas must be large enough to accommodate the building occupants likely to use the route. Exit stairs that continue beyond the level on which the exit discharge is located must be interrupted at that level by doors, partitions, or other effective means that clearly indicate the direction of travel to the exit discharge. Route doors must be unlocked from the inside.
They must be free of devices or alarms that could restrict use of the route if the device or alarm fails. Side-hinged exit doors must be used to connect rooms to the routes. These doors must swing out in the direction of travel if the room is to be occupied by more than 50 people or if the room is a high-hazard area. These routes must support the maximum permitted occupant load for each floor served, and the capacity of an exit route many not decrease in the direction of exit route travel to the exit discharge. Ceilings of exit routes must be at least 7 feet, 6 inches high. An exit access must be at least 28 inches wide at all points. Where there is only one exit access leading to an exit or exit discharge, the width of the exit and exit discharge must be at least equal to the width of the exit access. Objects that project into the exit must not reduce its width.
Outdoor routes are permitted but must meet the minimum height and width requirements for indoor routes and must -have guardrails to protect unenclosed sides if a fall hazard exits; -be covered if snow or ice is likely to accumulate, unless the employer can demonstrate accumulations will be removed before a slipping hazard exists; -be reasonably straight and have smooth, solid, substantially level walkways ; and -not have a dead-end longer than 20 feet. What are the requirements for exits?
They must be separated by fire resistant materials - that is, one-hour fire-resistance rating if the exit connects three or fewer stories and two-hour fire-resistance rating if the exit connects more than three floors. Exits are permitted to have only those openings necessary to allow access to the exit from occupied areas of the workplace or to the exit discharge. Openings must be protected by a self-closing, approved fire door that remains closed or automatically closes in an emergency. What are the maintenance, safeguarding, and operational features for these routes? OSHA standards require employers to do the following: Keep routes free of explosive or highly flammable furnishings and other decorations.
Arrange routes so employees will not have to travel toward a high-hazard area unless the path of travel is effectively shielded from the high-hazard area. Ensure that these routes are unobstructed such as by materials, equipment, locked doors, or dead-end corridors.
Ensure that safeguards designed to protect employees during an emergency remain in good working order. Provide lighting for the routes adequate for employees with normal vision. Keep doors free of decorations or signs that obscure the visibility of exit route doors. Post signs along the exit access indicating the direction of travel to the nearest exit if that direction is not immediately apparent.
Also, the line-of-sight to an exit sign must be clearly visible at all times. Mark doors or passages along a route hat could be mistaken for an exit "Not an Exit" or with a sign identifying its use (such as "Closet"). Install "EXIT" signs in plainly legible letters. Renew fire-retardant paints or solutions often enough to maintain their fire-retardant properties. Maintain routes during construction, repairs or alternations. Provide an emergency alarm system to alert employees, unless employees can promptly see or smell a fire or other hazard in time to provide adequate warning to them.

Peter Altuch,

President HR Training University
»»  read more

Minggu, 03 Mei 2009

Fire Extinguisher Signs- People’s Guide To Safety


Fire extinguisher signs are identification signs, designed to direct users toward the location of extinguishers. These signs are normally mounted near the firefighting equipment, to ensure that all prospective users will be able to identify the extinguisher’s designated place. For instance, if the extinguisher is placed on a large pole, it is only advisable to place the sign at the top of the pole itself, where people can readily see and notice.The signs are usually made from a number of self-adhesive materials, including aluminum, PVC and vinyl. Other types of signs are made with both text and pictograms, making it easier for people to actually relate and understand directions, referring to the place where the device is really kept. There are also a number of modern signs, which describe the safety device in detail. Aside from the usual words and pictograms, these signs likewise have specific details regarding the extinguishing agent as well as the classification of fires. These types of signs even relate to users the effectiveness of said equipment in accordance to fire classes and categories.As part of normal procedures and regulations, public and government buildings are also required by law to abide and comply with local legal codes. Fire extinguisher signs and its use are also supported by these regulations, emphasizing the provision of an identification or ID sign in designated sites and locations. The requirement further relates the importance of securing these ID’s, as part of compliance with said legal codes. Moreover, these signs are similarly available and provided for other types of fire safety equipment, including fire blankets, fire hose reels/racks as well as emergency equipment like first-aid kits.

With regards to placement of these signs, it is best to note that an extinguisher sign should be mounted to the side or above the firefighting equipment. In such way, people can readily notice the existence of said signs and react accordingly in times of fires and incidents. It is also advisable to adhere or follow the regulations, as prescribed by most licensing authorities. Besides, these authorities have the accurate standards with regards to the appearance and features of these signs, making it easy for companies to comply. More so, it is always advisable to keep track and know procedures in line with the use of these signs, as you have to determine the right measurements in relation to the sign’s height and size. If you are bent on using modern types of signs, photo luminescent extinguisher signs offer the best material. These signs are made of a distinct material called polymer, which absorbs light and is highly-visible in the dark. In addition, these signs are supported by an external power supply, making it a low-cost and reliable alternative. In some cases, photo luminescent signs are often referred to as reflective. On the contrary, reflective signs are quite different from photo luminescent signs, as it only returns light on a limited basis. However, many extinguishers and mounting posts make use of reflective adhesive tape, to easily identify their respective locations. It is understood that emergencies like fires bring out the best and worst in people. Our ability to act amidst all the panic and confusion depends on the environment and severity of situation. In times of fires, we definitely need something to hold on to like a pillar of hope. And with the proper use and installation of safety signs, we are somehow assured that there is indeed safety beyond fire and smoke.
By: Brian Ayling
»»  read more

Senin, 13 April 2009

What to do when you are trapped in a lift??


We never know when and where accidents will happen to us OR people around us. Read on and hope this piece of information may help any of us when things do happen to our self, our friends and our loved ones.
One day, while in a lift, it suddenly broke down and it was falling from level 13 at a fast speed. Fortunately, I remembered watching a TV program that taught you must quickly press all the buttons for all the levels.
Finally, the lift stopped at the 5th level.
When you are facing life and death situations, whatever decisions or actions you make decides your survival.
If you are caught in a lift break down, first thought in mind may be 'waiting to die'...
But after reading below, things will definitely be different the next time you are caught in a lift.
First - Quickly press all the different levels of buttons in the lift.
When the emergency electricity supply is being activated, it will stop the lift from falling further.
Second - Hold on tight to the handle (if there is any).
It is to support your position and prevent you from falling or getting hurt when you lost your balance.
Third - Lean your back and head against the wall forming a straight line.
Leaning against the wall is to use it as a support for your back/spine as protection.
Fourth - Bend your knees
Ligament is a flexible, connective tissue. Thus, the impact of fractured bones will be minimized during fall.
»»  read more

Kamis, 26 Maret 2009

Cara Menanggulangi Bahaya Kimia Saat Darurat


Cara menanggulangi bahan kimia pada saat darurat yaitu :

Respon terhadap tumpahan bahan kimia atau buangan lain mungkin
mengandung banyak kegiatan yang berbeda dan mungkin terkait dengan
syarat peraturan yang bermacam-macam.
Kegiatan dan prosedur respon juga tidak akan terduga tergantung dari
sifat alamiah dan jumlah bahan yang terbuang. Bila perusahaan
menyimapan bahan kimia dalam jumlah besar yang dikirim dengan tempat
yang besar (truk tanker atau kereta), maka harus disiapkan tindakan
untuk merespon insiden atas bahan dalam jumlah besar. Bahan yang
terbuang dalam jumlah besar mungkin memerlukan evakuasi perusahaan,
tempat tumpahan, dan pembersihan dan pembuangan bahan sisa limbah.
Jumlah bahan yang terbuang dalam jumlah kecil mungkin hanya memerlukan
sedikit persiapan lanjutan.

Secara umum, prosedur tanggap darurat harus ditargetkan untuk bahan
kimia yang disimpan dalam tangki besar atau digunakan secara luas di
perusahaan, dengan persyaratan terdapat semua pelaporan peraturan yang
spesifik pada saat terbuangnya bahan kimia, dan pada bahan berbahaya
yang akut, walaupun dalam jumlah kecil. Apakah insiden mengandung
tumpahan bahan berbahaya atau terbuangnya gas atau uap, koordinasi
masyarakat merupakan hal yang kritis bila terbuangnya bahan kimia
mungkin memiliki dampak keluar perusahaan. Karenanya, perusahaan yang
mungkin mengalami terbuangnya bahan kimia dengan potensi berdampak
keluar perusahaan harus memiliki suatu mekanisme dalam memberikan
peringatan dini yang memberitahukan bangunan tetangga dan masyarakat.
Menggunakan sensor dan detektor kebocoran bahan kimia yang tepat dapat
membantu memberikan peringatan dini saat terjadi terbuangnya bahan kimia.

Pelepasan atau kecelakaan dalam waktu cepat yang melibatkan bahan
kimia berbahaya dapat menjadi ancaman bagi karyawan
perusahaan,masyarakat, dan lingkungannya. Persiapan-persiapan ini
harus menjamin bahwa prosedur yang efektif dilakukan untuk
mengendalikan setiap potensi keadaan darurat akibat bahan kimia ini.
Rencana ini memberikan alat bantu yang penting untuk mengevaluasi
bahaya bahan kimia di perusahaan dan menjamin cara-cara yang tepat
ditempat untuk mengontrol bahan kimia tersebut pada situasi darurat.

Rencana ini juga dimaksudkan untuk membantu perusahaan untuk
mengembangkan prosedur tanggapan darurat atas bahan kimia. Saat
mengembangkan prosedur-prosedur ini, perusahaan harus memperhatikan
peraturan setempat yang mungkin mengharapkan kegiatan respon khusus
dan pemberitahuan pada lembaga setempat yang berwenang. Prosedur yang
mungkin perlu dikembangkan oleh perusahaan mungkin berbeda tergantung
dari bahan kimia yang digunakan.

Pengendalian bahaya-bahaya bahan kimia menyangkut manajemen resiko dan
prosedur tanggap darurat. Kegiatan manajemen resiko memainkan peran
penting dalam pencegahan kecelakaan terlepasnya dan keadaan darurat
bahan kimia.

A. PERSYARATAN

Kecelakaan atau lepasnya bahan kimia dapat menimbulkan situasi yang
mengancam karyawan, masyarakat, dan lingkungan. Persyaratan yang
mengarah pada bahaya kimia merupakan cerminan dari bahan kimia yang
digunakan di perusahaan. Suatu proses dua langkah harus dilakukan
untuk menggambarkan bahaya bahan kimia:

(1) Identifikasi dan evaluasi bahan kimia dan

(2) Menjamin adanya peralatan untuk mengendalikan bahaya bahan kimia.
Penggambaran ini akan membantu perusahaan dalam mempersiapkan dan
menanggapi dengan benar keadaan darurat yang melibatkan bahaya bahan
kimia.

B. EVALUASI BAHAYA BAHAN KIMIA

Semua bahan kimia di perusahaan harus dievaluasi untuk menentukan
beragamnya efek bahan – bahan tersebut dalam kondisi buruk, seperti
suatu keadaan darurat atau tumpahan/buangan. Untuk mengerjakan
evaluasi bahaya bahan kimia, perusahaan pertama kali harus menentukan
bahan apa yang ada didalamnya. Kemudian, harus diidentifikasikan
bahaya yang berhubungan dengan setiap bahan kimia. Informasi bahaya
bahan kimia harus dievaluasi dengan membandingkan kuantitas dan
potensi resiko dari suatu keadaan darurat akibat bahan kimia tersebut.
Metode ini akan membantu perusahaan untuk mencapai target aktivitas
perencanaan keadaan darurat bahan kimia.

Perusahaan pertama kali harus mengembangkan Daftar Bahan Kimia Yang
Disetujui, yang memuat daftar bahan kimia yang sedang digunakan atau
disimpan di perusahaan. Untuk setiap bahan kimia pada Daftar Bahan
Kimia Yang Disetujui, Formulir Identifikasi dan pelacakan Bahan Kimia
harus diisi yang mengidentifikasikan nama bahan kimia, lokasi
penggunaan atau penyimpanan, perkiraan kuantitas, dan kelas bahan
kimia (seperti mudah terbakar, korosif, radioaktif, beracun, dan
lain-lain. Formulir ini termasuk informasi bahaya bahan kimia dan
respon terhadap bahan kimia.

Perusahaan harus menggunakan lembar data keselamatan bahan (MSDS) yang
berlaku dan pelabelan bahan kimia untuk menentukan bahaya yang terkait
dengan setiap bahan kimia. Lembar data keselamatan bahan (MSDS) harus
mudah dijangkau oleh karyawan sebagai acuan pada saat terjadi keadaan
darurat bahan kimia. Semua wadah bahan kimia (seperti tangki, drum,
botol, pipa, dll.) harus diberi label dengan benar. Label-label ini
harus diberi nama bahan kimia dan peringatan akan bahaya yang cepat.
Identifikasi wadah dan peringatan yang benar merupakan kesatuan dari
tanggap darurat atas buangan bahan kimia.

C.P3K ATAS KERACUNAN

Cara pertolongan pertama pada kecelakaan (P3K) terhadap korban yang
terkena bahan toksik, secara garis besar adalah sebagai berikut :

* Bila bahan kimia terhirup, maka bawa korban ke lingkungan dengan
udara bersih.
* Bila bahan kimia masuk mata, cuci bersih dengan air mengalir
terus menerus selama 5-10 menit.
* Meminumkan karbon aktif untuk menurunkan konsentrasi zat kimia
dengan cara adsorpsi.
* Meminumkan air untuk pengenceran.
* Meminumkan susu untuk menetralkan dan mengadsorpsi asam atau
basa kuat dan fenol.
* Untuk memperlambat atau mengurangi pemasukan racun maka dapat
diberikan garam laksania (hanya boleh dilakukan oleh Paramedis!!!)
(MgSO4, Na2SO4) yang akan merangsang peristaltik dari seluruh saluran
pencernaan sehingga efek osmotik akan memperlambat absorbsi air dan
membuat racun terencerkan.
* Jika keracunan sudah agak lama, maka korban dibuat muntah untuk
mengosongkan lambung, dengan pemberian larutan NaCl (garam dapur)
hangat. Tetapi hal ini tidak diperbolehkan untuk korban yang masih
pingsan atau keracunan deterjen, bensin, BTX (Benzene, Toluen,
Xylene), CCl4.
* Segera bawa ke klinik.


By Roma (K3_LH)
»»  read more

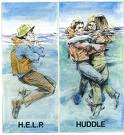
Penyelamatan Diri di Air/ Water Survival


Penyelamatan diri di air atau bisa disebut “Water Survival/Sea Survival”. Water Survival/Sea Survival adalah technique/cara bertahan hidup diair/laut dengan menggunakan segenap kemampuan dan di tunjang oleh life saving equipment seperti: Life Jacket, Thermal Protector, Life Rafts, Rubber boat, life ring dll, peralatan ini biasa disebut Personnel Life Saving, Untuk dapat effective menggunakan Personnel Life Saving, tentu ada trainingnya dengan institusi yang sudah diakui dan di Jakarta sudah banyak, termasuk ber-standard international.

Sebagai gambaran ada beberapa tindakan yang sangat penting untuk diketahui dalam prinsip bertahan hidup di air/dilaut antara lain:
Sebagai modal utama adalah suatu kemauan dan kekuatan untuk hidup, dengan berusaha tetap survive
Menghemat energi dan tenaga ketika kita berada di air/dilaut (mengambang)
Menggunakan semua peralatan penolong ataupun penyelamat yang ada dikapal termasuk diketemukannya benda mengapung ketika kita berada di air/dilaut
Menggunakan peralatan penolong ataupun penyelamat sesuai dengan petunjuk atau donning instructions
Berhemat terhadap perbekalan seperti food ration ataupun drinking water
Untuk menghindari dehydrate jangan meminum air laut karena semakin kita minum semakin membuat kita haus

Diperlukannya Penyelamatan diri di air atau dilaut akibat dari situasi darurat seperti kapal kandas/karam, kebakaran, man overboard, dll, dengan kata lain ship abandon, namun ship abandon ini harus atas instruksi langsung dari Captain/Master/Nakhoda dengan pertimbangan kapal sudah tidak layak dan tidak aman bagi ABK dan Passenger ataupun muatan.
Biasanya ketika meninggalkan kapal akan di isyaratkan dengan kode melalui bell/alarm atau suling kapal sebanyak 7x dring pendek dan 1x dering panjang secara terus menerus. Bila terdengar instruksi atau dring seperti ini maka seluruh penumpang tidak boleh panic dan segeralah:
Pakailah pakain tertutup sebanyak mungkin yang dapat menahan dingin/panas, termasuk memakai kaos kaki warna hitam, tujuannya untuk menghindari mangsa dari ikan buas.
Pakailah life jacket/jacket pelampung yang diperuntukan buat anda. Instruk cara pemakaian life jacket dan life saving biasa di posted pada dinding-dinding kapal atau bulletin board dan atau dijelaskan saat induction.
Bawa ID Card atau surat berharga protect dengan kantong plastic dan masuk kekantong baju/celana dan kancingkan, tujuannya bila anda diketemukan mempermudah identifikasi korban
Minumlah air tawar dan bila memungkinkan bawalah air tawar dan makanan karena kita tidak pernah tahu kapan kita mendapat pertolongan
Bila anda mengalami luka robek dan berdarah, hentikan pendarahan dan balut dengan perban sebanyak mungkin agar dari berhenti menetes guna menghindari penciuman dari ikan buas
Segeralah menuju ke Muster Point yang telah ditentukan, sementara ABK akan mempersiapkan peluncuran (launching) utk Liferafts/Sekoci/Rubber boat, dll

Penting untuk di ketahui bahwa:
Semua kapal-kapal yang standarisai SOLAS dan ISM Code, selalu memberikan induction dan familiarization kepada Passenger /visitor ketika mereka naik ke atas kapal, termasuk tempat muster point, station bill, nomor rakit penyelamat dll. Selain dari induction dan familiarization, Passenger juga akan mengikuti drill secara regular selama dalam pelayaran. Drills yang dimaksud antara lain: Fire Drill, Security Drill, Man Over Board Drill, Ship Abandon Drill, dll. Tujuan dari drills ini tentunya untuk melatih dan membiasakan passenger & ABK dalam menghadapi situasi emergency.

Dalam situasi darurat kita tidak boleh takabur sekalipun kita bisa berenang namun tetap diharuskan menggunakan jacket pelampung agar badan tetap terapung, bila seseorang lama terapung didalam air biasanya akan memungkinkan tidak sadarkan diri, kram/kejang otot atau lain sebagainya, nah jacket pelampung inilah yang menahan dia agar tetap terapung dan berkemungkinan besar dapat bernapas, karena bila memakai Jacket pelampung secara benar sesuai instructions, pasti korban dapat terapung dengan muka menghadap keatas (Tapi Jacket Pelampung yang Standard SOLAS, gitu lho…) dan Sesuai ketentuan SOLAS IX & ISM 10.1 setiap jacket pelampung harus dilengkapi dengan” Nama Kapal, Pelabuhan Pendaftaran, Light with exp.dat, Whistle and Retro Reflective Tape.

Tata Cara terjun Kelaut Dengan Jacket Pelampung:
Pastikan Jacket Pelampung telah dipakai dan terikat kuat sebagaimana mestinya
Berdiri tegak disisi kapal, lihat kepermukaan laut/air, kemungkinan ada pusaran air atau object yang menghalangi.
Tutup hidung dan mulut dengan sebelah tangan untuk mencegah air masuk ketika terjun.
Tangan yang satunya memegang bagian atas depan (dibawah bahu sedikit) jacket pelampung. Sebaiknya disilangkan kedua lengan anda. Tekan Jacket pelampung kebawah, karena apabila tidak ditekan ketika terjun dan mencapai air, Jacket Pelampung akan terdorong keatas oleh tekanan air ini dapat memukul dagu sipemakai.
Sekali lagi lihat permukaan laut/air, pastikan clear
Loncatlah dengan kaki tertutup rapat dan lurus, pandangan kedepan (loncat dengan kedua kaki bersamaan, tutup rapat selangkangan biar harta pusaka tidak nenek moyang tidak cacat, tak ada guna hidup bila sudah ndak berpungsi…..)
Jangan pernah loncat langsung ke Lifeboat/sekoci/liferaft/rubberboat/lifering bouy
Jangan terjun dari ketinggian lebih dari 4.5M, kecuali dalam keadaan terpaksa/sudah tidak ada cara lain atau permukaan terendah selain 4.5M

Ada beberapa factor yang dapat menunjang seseorang untuk survive ketika berada di dalam laut/air, yang biasa diistilahkan penguasaan diri dari kepanikan
Kemauan besar untuk tetap hidup dapat timbul dari adanya tanggung jawab moral terhadap keluarga/dinas, disamping itu didorong oleh semagat pribadi yang tak pernah mengenal kata putus asa. (Hope & Love)
Jangan pernah menghindari dari masalah dan ketakutan, taklukan dia dengan mempelajari apa yang menyebabkan kita takut, setelah diketahui ambil tindakan untuk mengurangi rasa takut tersebut
Sembahyang dan atau berdo’a adalah cara yang tepat untuk memperkuat mental pribadi, jangan pernah merasa malu untuk mengerjakannya, karena memang kita ini hanya hamba.

Keselamatan penumpang ketika menaiki passenger ship :
Kenakan work-vest/Jacket pelampung ketika anda melalui gang way menuju ke atas kapal
Bila anda telah berada diatas kapal, anda diminta masuk ke ruangan penumpang.
Captain/Master/Nakhoda adalah sipenanggung jawab penuh terhadap kapal maupun penumpang, anda harus mengikuti semua perintahnya selama anda berada di kapal
Semua penumpang harus mengikuti semua peraturan yang di berlakukan di atas kapal, termasuk peraturan-peraturan keselamatan yang di peragakan.
Semua penumpang harus tetap berada didalam ruangan sampai Captain/Master/Nakhoda memperbolehkan anda untuk keluar.
Semua penumpang dilarang melompat dari kapal ke dermaga, ini sangat berbahaya, laluilah gang way atau tangga yang diperuntukan buat penumpang dan tertiplah jangan desak-desakan, terpeleset, terjatuh atau Man Over Board adalah merupakan potential hazard ketika melalu gang way.

By: B Lubis - K3_LH
»»  read more

Senin, 23 Maret 2009

Penyelamatan korban di Air


Sebagai seorang yang akan menyelamatkan korban, sebaiknya anda mempunyai persyaratan khusus sebagai seorang penyelamat di air. Karena banyak bahaya –bahaya yang terhadap diri anda saat memberi pertolongan di air. Anda juga harus mempunyai pengalaman melalui pendidikan dan pelatihan yang standar sesuai standar minimal.

Standar minimal penyelamat yaitu :
Mempunyai fisik yang kuat, dalam arti mampu berlari 200m dilanjutkan berenang 200m serta berlari lagi 200m. Keseluruhannya dilakukan maksimal dalam waktu 8 menit .
Keahlian melakukan P3K dan menggunakan alat bantu
Selalu dalam kondisi fit .

Pada dasarnya air adalah tempat yang berbahaya , karena air bukan habitat kita. Di air banyak kita temui hal-hal yang dapat mencelakai manusia seperti panik,kram,lelah .Serta adanya makhluk hidup lain yang membahayakan seperti ular, sengatan binatang atau kondisi lingkungan yang berbahaya seperti duri , paku,dan tonggak serta adanya arus air.

Keberhasilan pertolongan di air ditentukan oleh kemampuan penolong dalam memilih teknik pertolongan yang tepat. Sebaiknya pertolongan dipilih berdasar resiko yang terkecil yang akan menimpa diri penolong. Adanya alat-alat pertolongan yang standar juga sangat membantu keberhasilan pertolongan.Namun jika tidak ada penolong harus menyadari bahwa segala benda yang dapat terapung dapat dijadikan alat bantu pertolongan.

Ada metoda pertolongan yang sampai saat ini terbukti dan merupakan cara pertolongan yang paling efektif.Metodenya adalah ”Reach, Throw, Row , Go , Tow / Carry” (RTRGD) .Pedoman ini berupa urutan langkah kerja yang harus dilakukan penolong mulai dari yang paling sederhana, aman bagi penolong sampai dengan cara yang paling beresiko bagi penolong .

Reach :
Pertolongan yang dilakukan dari pinggir kolam atau darat. Dilakukan dengan cara meraih atau menjangkau korban. Saat menolong anda perlu bicara pula dengan korban untuk menenangkannya. Anda juga tetap berusaha mengamankan diri anda agar tidak ikut tercebur dengan cara memegang benda yang tidak labil di sekitar anda. Tarik korban dengan perlahan ke lokasi yang aman. Jaga tarikan yang teratur dan hindari sentakan keras agar pegangan korban tidak terlepas. Kemudian amankan korban bila korban sudah berpegangan pada dermaga atau tangga di pinggir kolam . Alat bantu yang bisa dipakai berupa galah,dayung,bambu, tongkat. Bila lokasi air dangkal anda bisa melakukan dengan rantai manusia (beberapa orang yang saling bergandengan hingga menjangkau korban).

Throw :
Adalah metode pertolongan dengancara melempar alat apung dan posisi penolong berada di lokasi yang aman. Alat yang di lempar dapat diikat dengan tali atau tanpa menggunakan tali.Sedangkan alat yang digunakan dapat berupa Ring Buoy atau bila dalam keadaan darurat dapat digunakan derigen plastik .

ROW:
Bila kedua langkah sebelumnya tidak dapat dilakukan gunakan langkah ini.Penolong harus mendekat ke korban, dapat memakai kapal kecil, perahu karet, kano atau papan selancar .Setelah dekat dengan korban lakukan langkah Reach / raih atau Throw / lempar.

GO :
Ini adalah langkah pilihan terakhir, karena ketidak tersedianya peralatan untuk mendekati korban, sedangkan korban posisi cukup jauh dari si penolong dan perahu tidak mungkin dipakai. Maksud dari pada Go yaitu si penolong berenang mendekati korban dengan membawa alat apung. Alat apung kemudian diberikan ke korban.Selanjutnya si penolong menuju ke tempat aman secara sendirian atau bersama dengan korban. Tujuan pertolongan dengan metode GO adalah memberi alat apung pada korban supaya korban tetap mengapung sambil menunggu pertolongan . Keberhasilan pertolongan ini tergantung tingkat kesadaran korban, dan tidak berlaku bagi korban yang tak sadarkan diri.Dan juga alat apung yang diberikan hanya sebagai pertolongan awal karena si korban masih berada di lokasi yang tidak aman.

TOW / CARRY :
Adalah metode yang paling beresiko tinggi bagi penolong. Dalam menolong , sikorban ditarik ke darat,pinggiran kolam atau danau atau dermaga. Dalam sistim ini penolong tidak langsung kontak dengan korban. Sedangkan maksud dari Carry yaitu teknik membawa korban dengan kontak langsung sehingga menambah resiko. Pertolongan dengan metode Towing dilakukan bila: Jarak dengan korban jauh sehingga tidak memungkinkan di raih atau di lemparnya alat apung.Juga tidak adanya kapal kecil.Kondisi korban letih, cedera atau bahkan tak sadarkan diri .

Masih banyak yang lainnya, tapi sampai disini aja ya...
Saya sarankan kalau benar2 mau ingin jadi penolong, bikin aja team penyelamat khusus di air ada pelatihannya kok. tahun lalu biaya sekitar Rp.50 jt hingga 60 jt untuk sekitar 30 peserta.lama pelatihannya sekitar seminggu .
Maklum kalo mau jadi penolong maka yang utama selamatkan dulu diri anda.
apa lagi menolong di air, ada 2 nyawa yang harus ditolong , yaitu nyawa si korban dan nyawa diri anda yang mau menolong .


By Pracaya (K3_LH)
»»  read more

Free Download Area


Safety Pictures

Blog Archive


Copyright © 2009 by Quality Health Safety Environment